

A lot of the times, the default TextField provided by Django models isn't what we want when building a Django application, say a blog. We usually want to provide the users a more robust text field when they want to create articles or posts, a very common way to achieve this is by the use of rich text editors, also known as a What You See Is What You Get (WYSIWYG) editor.
In this article, I will show you how to integrate a rich text editor into your Django project. We will be building a blog to explain how this is done.
Let's first create a project folder and after that, create a virtual environment by running python -m venv env in the command line. After, we activate the virtual environment by running .\env\Scripts\activate in the project's root folder on the command line. Bear in mind that the command for activating virtual environments varies depending on your operating system, the command I used is for windows.
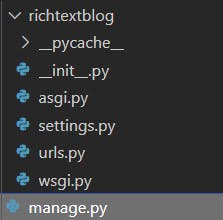
We need to install Django in other to create our Django project. We do this by running pip install django in our project root folder. After successful installation of Django, we can start up Django project by running django-admin startproject richtextblog on the command line inside our project root folder, "richtextblog" is the name of our Django project. Upon successful creation of the project, you project folder structure should look like in the image below:
Note that the manage.py should be on the same level as your Django project folder.
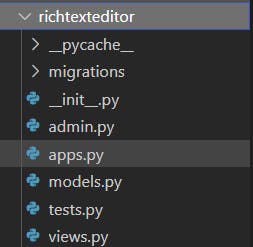
To be able to implement the rich text editor into the Django project we are building, we also need to create a Django app by running django-admin startapp richtexteditor in the project root folder. "richtexteditor" is the name of our app, you can choose to name it anything you want. Upon successful creation of the app, the app folder structure should look like in the image below:
 .
.
Now let us install the rich text editor package we will be using. We will be using django-ckeditor. In the project root folder, on the command line, run pip install django-ckeditor to install the package.
We have to register the newly created app and the package we just installed in the settings.py file so Django can be aware. Code to do that:
INSTALLED_APPS = [
    'django.contrib.admin',
    'django.contrib.auth',
    'django.contrib.contenttypes',
    'django.contrib.sessions',
    'django.contrib.messages',
    'django.contrib.staticfiles',
    'richtexteditor.apps.RichtexteditorConfig', #app we created on the command line
    'ckeditor' # Ckeditor package we just installed
    'ckeditor_uploader' # Add this if you want to use the widget for file upload
]
After that, we have to set up our static url and root in our settings.py file so ckeditor knows where to store the static assets like css and javascript that comes with it. In our settings.py file, we do the following:
STATIC_ROOT = os.path.join(BASE_DIR, "staticfiles")
STATIC_URL = '/static/'
We should also configure our media url and root and also include path for ckeditor to store user uploaded images.
MEDIA_URL = '/media/'
MEDIA_ROOT = os.path.join(BASE_DIR, "media")

CKEDITOR_UPLOAD_PATH = "uploads/"
In our projects urls.py file, we need to add the following code to ensure that our static and media files are being set up properly.
from django.contrib import admin
from django.urls import path, include
from django.conf import settings
from django.conf.urls.static import static

urlpatterns = [
    path('admin/', admin.site.urls),
    path('ckeditor/', include('ckeditor_uploader.urls')), # ckeditor url path
]

'''Configurations to ensure static and media files are being set up properly'''
if settings.DEBUG:
    urlpatterns += static(settings.MEDIA_URL, document_root=settings.MEDIA_ROOT)
To make the rich text editor appear in the content field of our form, we need to add the following code snippet in our settings.py file:
CKEDITOR_CONFIGS = {
    'awesome_ckeditor': {
        'toolbar': 'Basic',
    },
    'default': {
        'update': ['blockquote'],
    },
}
After adding CKEDITOR_CONFIGS, we have to go into the models.py file and tell Django to use Ckeditor's RichTextField instead of the built in TextField. The code snippet below shows how we can do this:
from django.db import models
from in ckeditor.fields import RichTextField

# Create your models here.

class Article(models.Model):
    title = models.CharField(max_length=1000)
    number_of_times_viewed = models.PositiveIntegerField(default=0)
    content = RichTextField() # The rich text field instead of the built in TextField
    date_published = models.DateTimeField(auto_now_add=True)

    def __str__(self):
        return self.title
Now , let's register our Article model in the admin file like this:
from django.contrib import admin
from .models import Article
# Register your models here.

admin.site.register(Article)
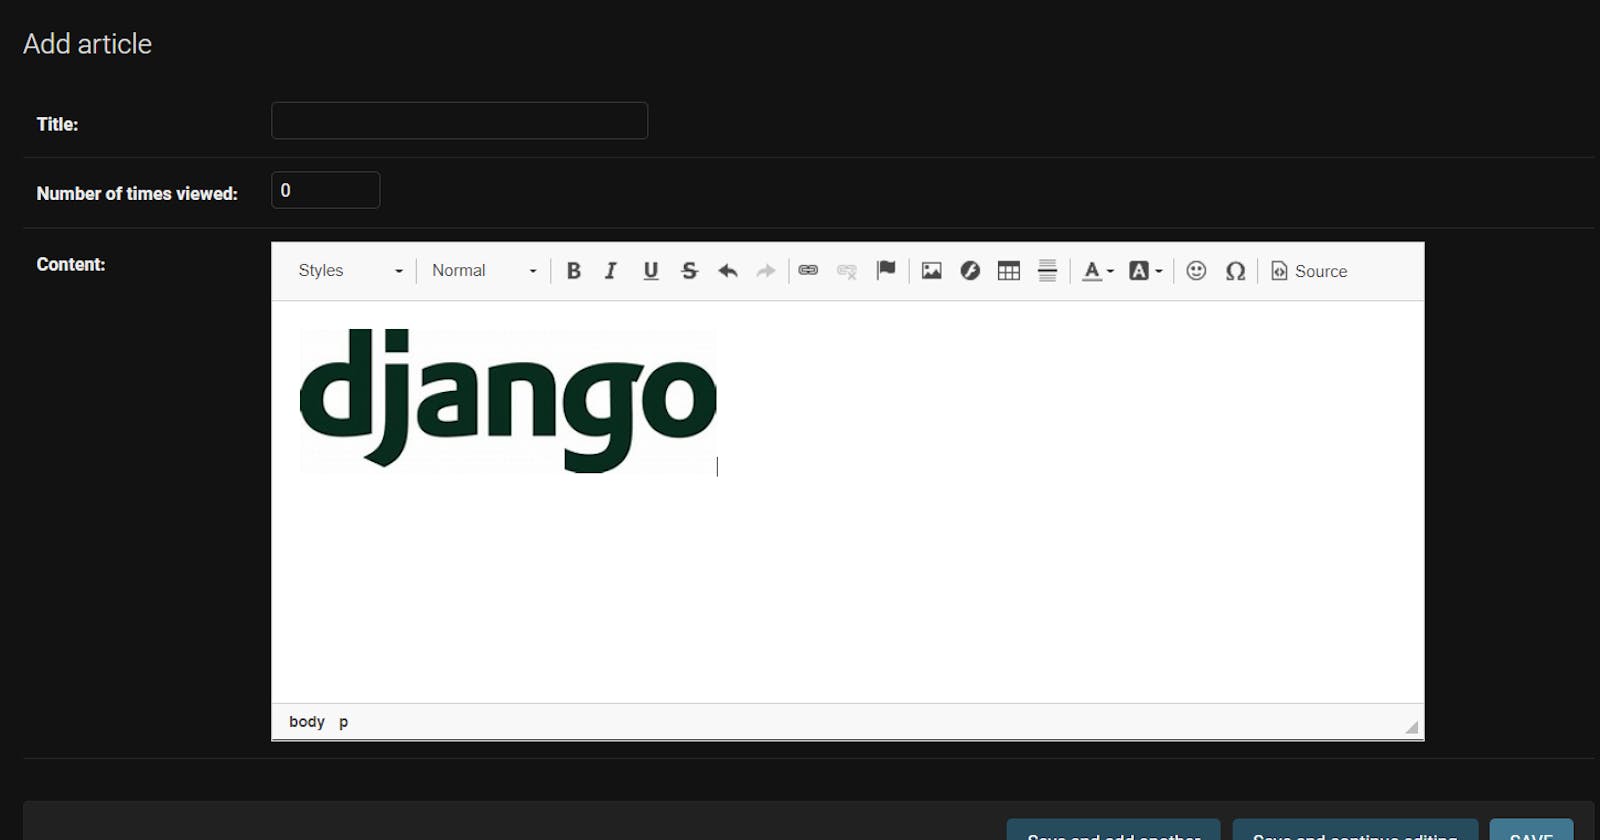
Now, we run migrations using python manage.py makemigrations and python manage.py migrate, create a super user to access the admin dashboad using python manage.py createsuperuser and then run the server using python manage.py runserver. If we click on the Article model that now appears in our Django admin and then click on the "Add article" button on the top right corner, we will see that the rich text editor is showing in the content field with the default toolbars.
 .
.
We also want the rich text editor showing in our forms on the frontend, let's do that.
Let's create a forms.py file inside richtexteditor folder, and add the code snippet below:
from django import forms
from ckeditor.widgets import CKEditorWidget

from .models import Article

class ArticleForm(forms.ModelForm):
    content = forms.CharField(widget=CKEditorWidget())
    class Meta:
        model = Post

        fields = ['title', 'content']
Let's also setup templates configuration in our settings.py file to enable Django serve html files. We do that by adding the following in our settings.py file:
TEMPLATE_DIR = os.path.join(BASE_DIR, "templates")
And then in the TEMPLATES variable, we pass in TEMPLATE_DIR variable into the list that has DIRS as its key
TEMPLATES = [
    {
        'BACKEND': 'django.template.backends.django.DjangoTemplates',
        'DIRS': [TEMPLATE_DIR, ], # We passed in TEMPLATE_DIR
        'APP_DIRS': True,
        'OPTIONS': {
            'context_processors': [
                'django.template.context_processors.debug',
                'django.template.context_processors.request',
                'django.contrib.auth.context_processors.auth',
                'django.contrib.messages.context_processors.messages',
            ],
        },
    },
]
After this is done, we need to write a view function to create article and another one to list them out. Inside the views.py file in our app's folder, we use the code below to list out all articles in the database and create an article respectively.
from django.shortcuts import redirect, render
from .models import Article
from .forms import ArticleForm

# Create your views here.

# View function that lists all the articles in the database
def home(request):
    articles = Article.objects.all()
    return render(request, 'richtexteditor/home.html', {'articles': articles})

# View function to create an article
def create_article(request):
    if request.method == 'POST':
        form = ArticleForm(request.POST)
        if form.is_valid():
            form.save()
        return redirect('richtexteditor:home')
    else:
        form = ArticleForm()
    return render(request, 'richtexteditor/create_article.html', {'form':form})
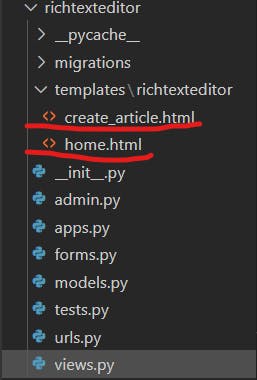
We are making use of some html files we have not created yet, so let us create them. In the app's folder, we create a new folder and name it "templates", this is because we named our folder "templates" when we created it using TEMPLATE_DIR = os.path.join(BASE_DIR, "templates") in our settings.py file. After creating the folder, we need to create another folder and give it the name of our app, in this case "richtexteditor". We could have just created the templates folder and then dump all our html files inside it, but Django recommends we create a folder with our app's name inside templates folder. Inside the new folder we just created, we can now create our html files, while at it, we should also create urls.py file (this time in the app's root folder) and leave it empty for now. At the end, our app's directory will look like in the image below.
Now inside home.html, we are going to list out all the articles this way:
<!DOCTYPE html>
<html lang="en">
    <body>
        {% for article in articles %}
         <div>{{article.title}}</div>
         <div>{{article.content|safe}}</div>
         <div>{{article.number_of_times_viewed}}</div>
         <div>{{article.date_published}}</div>
        {% endfor %}
    </body>
</html>
Note: It is important we add the safe filter to article.content because if we did not, Django will render the content with its html tags.
And inside create_article.html, we use the code snippet to render the rich text editor:
<!DOCTYPE html>
<html lang="en">
    <body>
        <form method="POST">
            {% csrf_token %}
            <p>Create Your article</p>
            {{form.as_p}}
            {{form.media}}
            <button type="submit">Create Article</button>
        </form>
    </body>
</html>
It is important to use {{form.media}} as this will render the field that has CKEditorWidget() set, in our case, the content field.
Note: If you are working on a big Django project, you do not want to repeat the same html tags that are common to the two files like I did, you instead want to use template inheritance
Now, let's create url paths for the view functions we have created, in the urls.py file we created above, enter the code snippet below:
from django.urls import path
from . import views

app_name = 'richtexteditor'

urlpatterns = [
    path('create', views.create_post, name='create'),
    path('home', views.home, name='home')
]
As the final step we also need to register our app's urls.py file inside the project's urls.py file, and we can do that by adding the code snippet below to the list of paths in urlpatterns:
path('', include('richtexteditor.urls'))
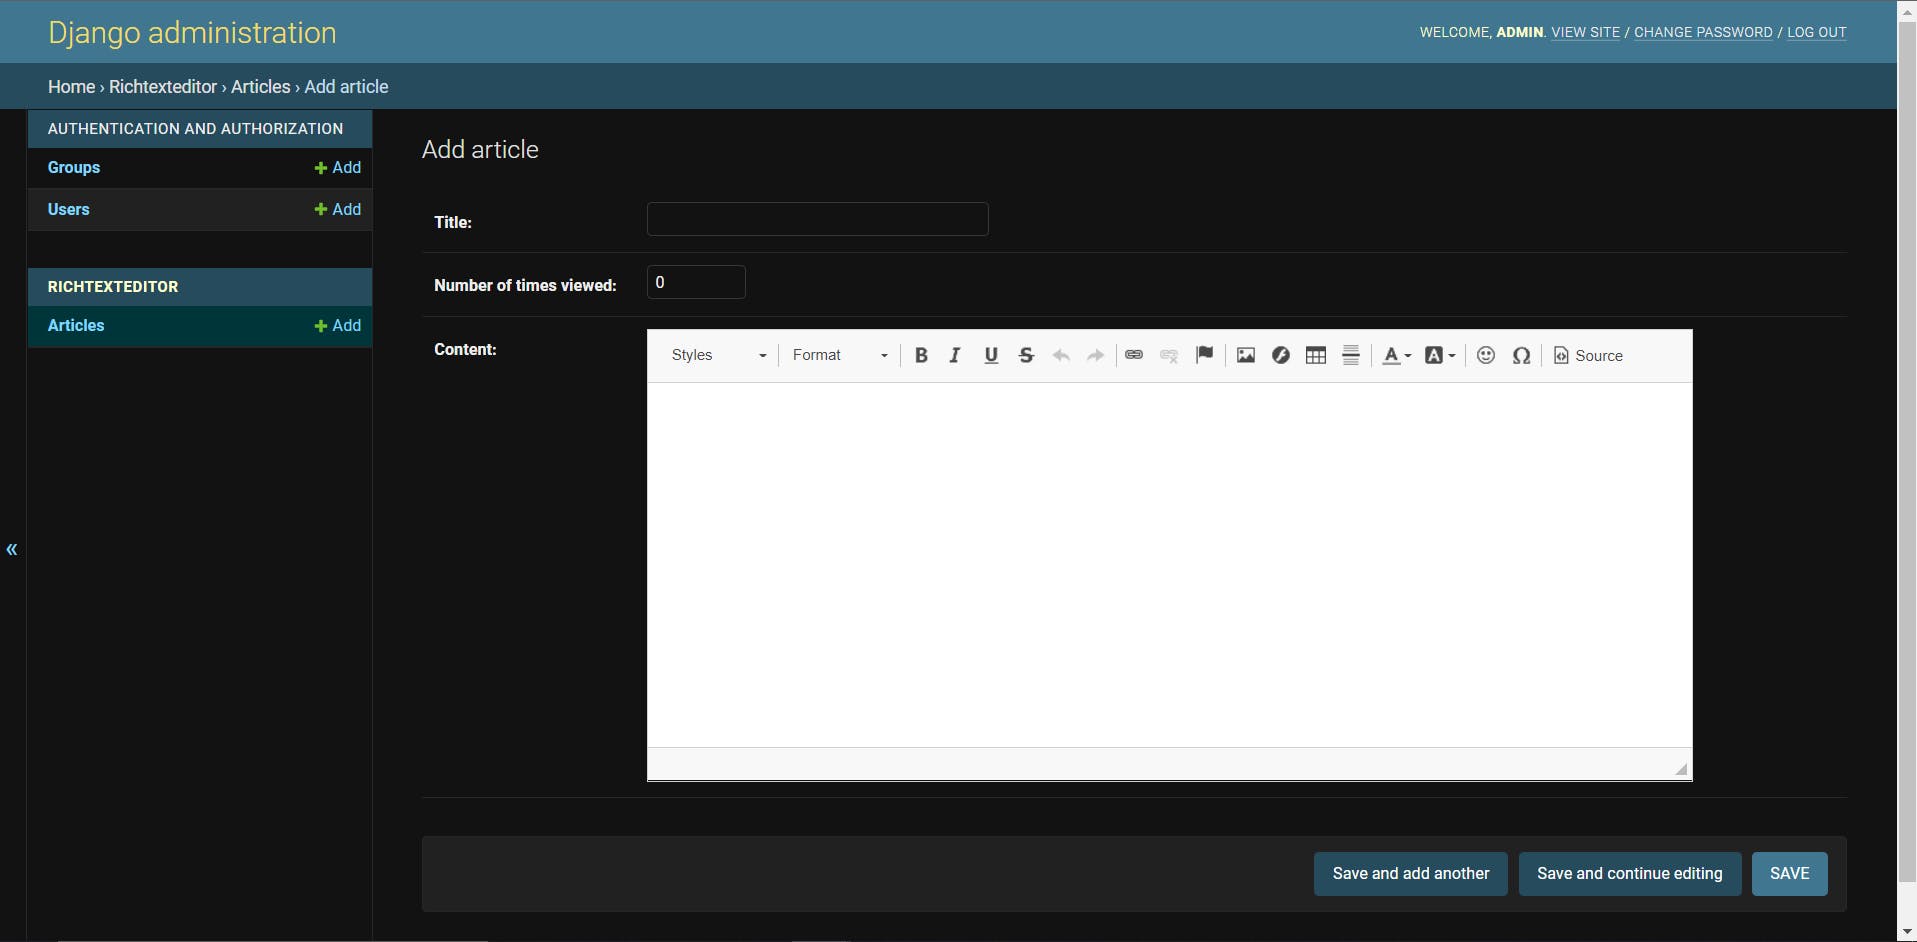
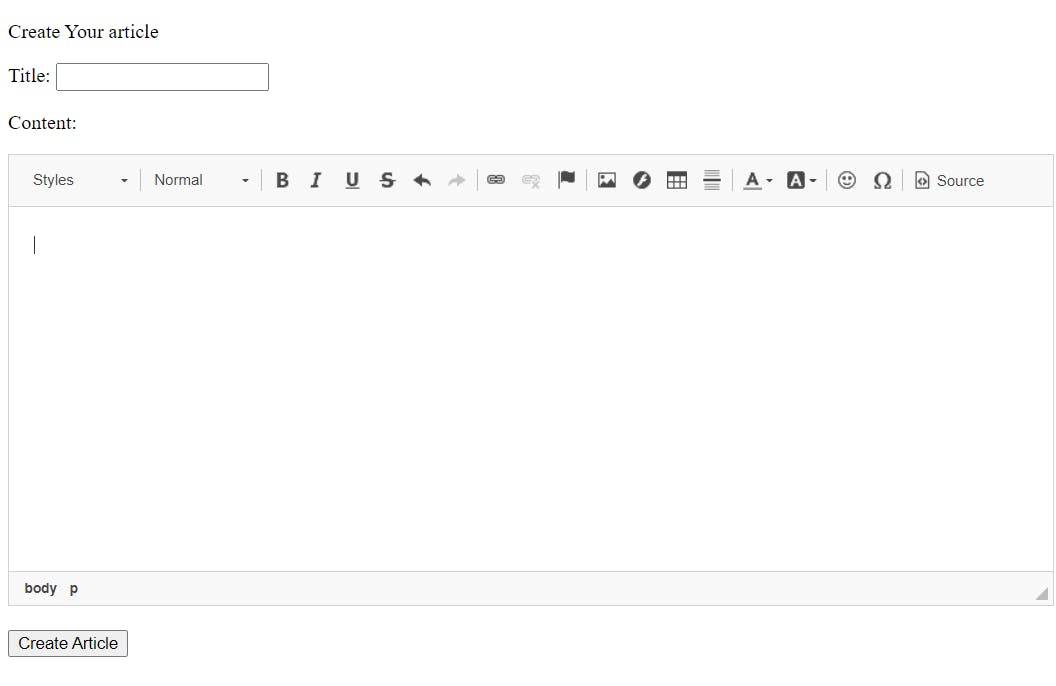
Let's run our server and go to localhost:8000/create in our browser, the webpage looks like in the image below:
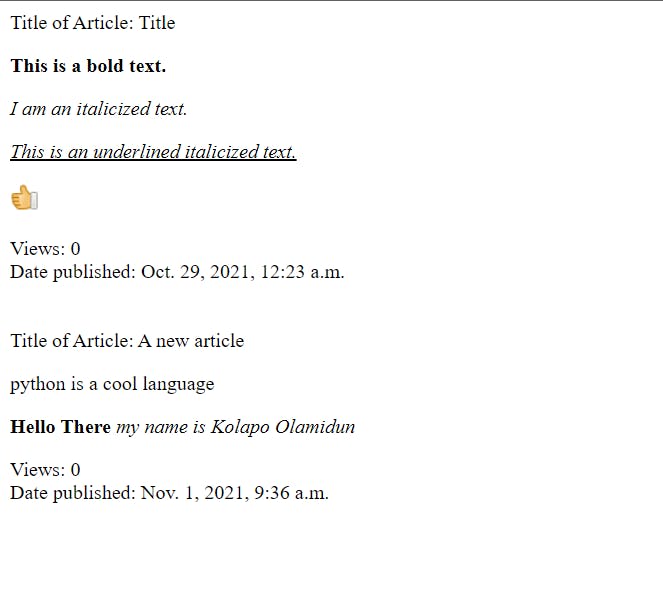
If we go to localhost:8000/home, our articles are listed out like in the image below:
 .
.
To enable image upload feature, we just have to do three things:
- Change
RichTextFieldbeing used in models.py file toRichTextUploadingFieldby importing it like this:
from ckeditor_uploader.fields import RichTextUploadingField
- Change the widget being used in forms.py from CKEditorWidget to CKEditorUploadingWidget by importing it like this:
from ckeditor_uploader.widgets import CKEditorUploadingWidget
- Run
python manage.py makemigrationsandpython manage.py migrateand then run the server. We will now be able to upload images.
If you want to see the full code for this article, you can check my github here
Link to documentation of the framework and library used: